Installing a Certificate on Your Smartphone

Before you start:

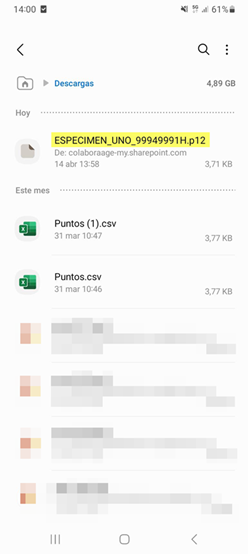
  • You need the certificate file (usually .p12 or .pfx), issued by the certification authority. (Other guides from the Public Administration explain how to request a certificate if you don't already have one, for example, on the FNMT website).
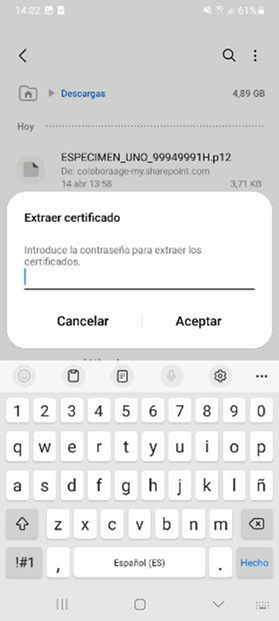
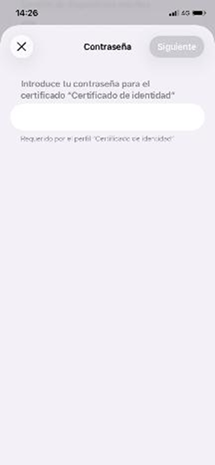
  • You must know the password you assigned when exporting or downloading the certificate.
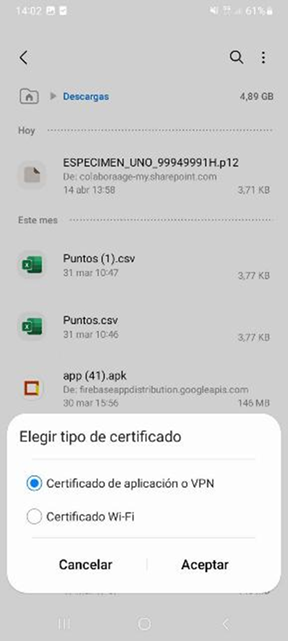
  • The installation process is very similar in all recent and older versions of Android and iOS, although you might notice slight variations in the following steps.

Important notices:

  • Do not share your certificate or password with anyone.
  • Back up your certificate.
  • Si cambias de móvil, tendrás que volver a instalarlo.

Step 1. Send the certificate to your phone

Download the certificate file (.p12 or .pfx) to your Android phone. To do this, you can, for example, email it to yourself, use a chat app you consider secure, or copy it by connecting your phone to your computer and browsing through folders. This last option is the most secure.

When downloaded directly to your phone from an app, the downloaded file is usually saved in the "Downloads" folder.

Step 2. Extract the certificate

Tap on the .p12 file you already have on your phone. The following screen will appear, where you must enter the password you assigned to your certificate during the issuance process with your certification service provider (FNMT, for example). Tap OK after entering the password.

Step 3. Choose certificate type

Next, the following screen will appear, where you must select the default option: Application Certificate or VPN. Tap OK.

Step 4. Name the certificate

On the next screen, you can assign the desired name to your certificate. This will be the name displayed in the applications where you will use the certificate. Tap OK.

With this, your certificate is now installed on your Android phone. A brief informational message will appear on the screen.

Step 1. Send the certificate to your iPhone

Download the certificate file (.p12 or .pfx) to your iPhone. To do this, you can, for example, email it to yourself, use a chat app you consider secure, or copy it by connecting your iPhone to your computer. The latter is the most secure option.

When downloaded directly from an app on your iPhone, the downloaded file is usually saved in the "Downloads" folder.

Step 2. Open Settings

If you tap on the .p12 file, it will tell you to go to Settings to install it. Open the "Settings" app.

Step 3. Downloaded Profile

You will see a new entry under Settings called "Downloaded Profile." Tap on this option. If it doesn't appear, go to Settings > General > VPN & Device Management.

Step 4. Install the certificate

On the next screen, tap "Install," enter your iPhone passcode, and tap Install again if prompted for confirmation.

Next, enter the certificate password and tap Next.

A confirmation screen will appear indicating that the profile has been installed.

Step 5. Verify that it's installed

You can verify this in Settings > General > VPN & Device Management. The certificate will now be available for authentication and signing.


Install a Certificate on Your Smartphone - Android or iOS